Js.html 영역
1. 기존의 회원가입 jsp부분의 HTML 파일
<div class="modal fade" id="sign-up" role="dialog">
<div class="modal-dialog">
<!-- Modal content-->
<div class="modal-content">
<div class="modal-header">
<h4 class="modal-title">
<span style="color: #643691;">Spring</span> 회원 가입
</h4>
<button type="button" class="close" data-dismiss="modal">×</button>
</div>
<div class="modal-body">
<table
style="cellpadding: 0; cellspacing: 0; margin: 0 auto; width: 100%">
<tr>
<td style="text-align: left">
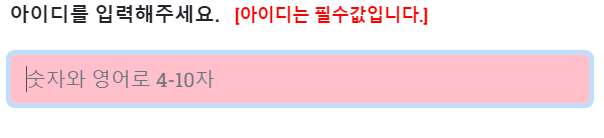
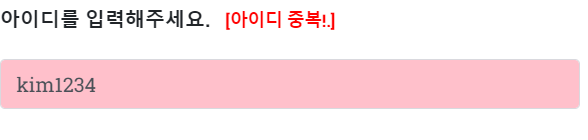
<p>
<strong>아이디를 입력해주세요.</strong> <span id="idChk"></span>
</p>
</td>
</tr>
<tr>
<td><input type="text" name="userId" id="user_id"
class="form-control tooltipstered" maxlength="14"
required="required" aria-required="true"
style="margin-bottom: 25px; width: 100%; height: 40px; border: 1px solid #d9d9de"
placeholder="숫자와 영어로 4-10자"></td>
</tr>
<tr>
<td style="text-align: left">
<p>
<strong>비밀번호를 입력해주세요.</strong> <span id="pwChk"></span>
</p>
</td>
</tr>
<tr>
<td><input type="password" size="17" maxlength="20"
id="password" name="userPw" class="form-control tooltipstered"
maxlength="20" required="required" aria-required="true"
style="ime-mode: inactive; margin-bottom: 25px; height: 40px; border: 1px solid #d9d9de"
placeholder="영문과 특수문자를 포함한 최소 8자"></td>
</tr>
<tr>
<td style="text-align: left">
<p>
<strong>비밀번호를 재확인해주세요.</strong> <span
id="pwChk2"></span>
</p>
</td>
</tr>
<tr>
<td><input type="password" size="17" maxlength="20"
id="password_check" name="pw_check"
class="form-control tooltipstered" maxlength="20"
required="required" aria-required="true"
style="ime-mode: inactive; margin-bottom: 25px; height: 40px; border: 1px solid #d9d9de"
placeholder="비밀번호가 일치해야합니다."></td>
</tr>
<tr>
<td style="text-align: left">
<p>
<strong>이름을 입력해주세요.</strong> <span id="nameChk"></span>
</p>
</td>
</tr>
<tr>
<td><input type="text" name="userName" id="user_name"
class="form-control tooltipstered" maxlength="6"
required="required" aria-required="true"
style="margin-bottom: 25px; width: 100%; height: 40px; border: 1px solid #d9d9de"
placeholder="한글로 최대 6자"></td>
</tr>
<tr>
<td style="padding-top: 10px; text-align: center">
<p>
<strong>회원가입을 환영합니다~~!</strong>
</p>
</td>
</tr>
<tr>
<td style="width: 100%; text-align: center; colspan: 2;"><input
type="button" value="회원가입" class="btn form-control tooltipstered"
id="signup-btn"
style="background-color: #643691; margin-top: 0; height: 40px; color: white; border: 0px solid #388E3C; opacity: 0.8">
</td>
</tr>
</table>
</div>
</div>
</div>
</div>
</div>
2. 패스워드 입력값 검증을 위한 Js코드
         const getIdCheck = RegExp(/^[a-zA-Z0-9]{4,14}$/);
         const getPwCheck = RegExp(/([a-zA-Z0-9].*[!,@,#,$,%,^,&,*,?,_,~])|([!,@,#,$,%,^,&,*,?,_,~].*[a-zA-Z0-9])/);
         const getNameCheck = RegExp(/^[가-힣]+$/);


          $('#password').keyup(function() {

    	  //비밀번호 란에 공백 확인
    	  if($(this).val() === ''){
    		  $(this).css('background-color', 'pink');
		 	  $('#pwChk').html('<b style="font-size: 14px; color: red">[비밀번호는 필수 정보 입니다..]</b>');
		 	  chk2 = false;
    	  }

    	  //비밀번호 유효성 검사
    	  else if(!getPwCheck.test($(this).val()) || $(this).val().length < 8){
    		  $(this).css('background-color', 'pink');
		 	  $('#pwChk').html('<b style="font-size: 14px; color: red">[특수 문자 포함 8글자 이상 !]</b>');
		 	 chk2 = false;
    	  }// 통과
    	  else{
    		  $(this).css('background-color', 'aqua');
		 	  $('#pwChk').html('<b style="font-size: 14px; color: green">[비밀번호 입력 완료!]</b>');
		 	 chk2 = true;
    	  }

	});
위의 const getpwcheck로 코드로 비밀번호의 유효성 검사를 한다.
3. 비밀번호 확인란 검증
//3. 비밀번호 확인란 입력 검증
$('#password_check').keyup(function() {
// 비밀번호 확인란 검증
if($(this).val() === ''){
	$(this).css('background-color', 'pink');
	$('#pwChk2').html('<b style="font-size: 14px; color: red">[비밀번호는 확인은 필수 정보 입니다.]</b>');
	chk3 = false;
	}
	/ 비밀번호 확인란 유효성 검사.
	else if($(this).val() != $('#password').val()){
	 $(this).css('background-color', 'pink');
	 $('#pwChk2').html('<b style="font-size: 14px; color: red">[비밀번호가 일치하지 않습니다.]</b>');
	 chk3 = false;
	}else{
	 $(this).css('background-color', 'aqua');
	 $('#pwChk2').html('<b style="font-size: 14px; color: green">[비밀번호 입력 확인 완료]</b>');
	chk3 = true;
}
4. 이름 입력값 검증
		$('#user_name').keyup(function() {
			if($(this).val === ''){
				 $(this).css('background-color', 'pink');
			 	 $('#nameChk').html('<b style="font-size: 14px; color: red">[이름은 필수 정보 입니다. ]</b>');
			 	 chk4 = false;
			}else if(!getNameCheck.test($(this).val())){
				 $(this).css('background-color', 'pink');
			 	 $('#nameChk').html('<b style="font-size: 14px; color: red">[이름은 한글 이외에 다른 값은 입력 할 수 없습니다. ]</b>');
			 	 chk4 = false;
			}else{
				$(this).css('background-color', 'aqua');
			 	 $('#nameChk').html('<b style="font-size: 14px; color: red">[이름 입력 완료! ]</b>');
			 	 chk4 = true;
			}
		}); //이름 입력 끝
5. 회원가입
$('#signup-btn').click(function() {

			if(chk1 && chk2 && chk3 && chk4){

				//Id정보
				const id = $("#user_id").val();
				//pw정보
				const pw = $('#password').val();
				//name
				const name = $('#user_name').val();
				//프로퍼티 이름은 반드시 userVO와 같아야 동작이 된다!! 매우 중요!
				const user ={
						"account" : id,
						"password" : pw,
						"name" : name
						// json 아님
				}

				// 비동기 통신 시작!
				$.ajax({
					type : "post",
					url : "/user/",
					contentType : "application/json",
					dataType : "text",
					// 자바스크립트 객체를 json문자열로 변환해 주는 메소드
					data : JSON.stringify(user),
					success : function(result) {
						console.log("통신 성공" + result);
						alert('회원가입을 축하합니다.');
						location.href ="/";
					},
					error : function() {
						alert('회원가입 실패!');
					}
				})
			}else {
				alert('입력정보를 확인 해 주세요.');
			}

		})/
사용자가 회원 가입 버튼을 눌렀을 때 이벤트 처리 및 사용자가 입력하는 4가지 데이터
(ID, PASSWORD, PASSWORD_CHECK, NAME ) 가 모두 일치해야 된다.
이때 ajax에서 url user쪽 컨트롤러로 const user의 정보의 객체에 담아 json 형식으로 요청을 보내게 된다.
스프링 영역
6. 컨트롤러 작성
	@PostMapping("/")
	public String register(@RequestBody UserVO vo) {
		System.out.println("/user/ : post");
		serivce.register(vo);
		return "joinSuccess";
	}
ajax에서 user객체를 담아 컨트롤러로 보내주어 @RequestBody의 어노테이션으로 UserVO를 전달 받아
service 쪽으로 넘기게 된다.
7. 서비스 작성
	public void register(UserVO vo) {
		//회원 비밀번호를 암호화 인코딩
		BCryptPasswordEncoder encoder = new BCryptPasswordEncoder();
		System.out.println("암호화 하기 전 비번 : " + vo.getPassword());

		//비밀번호를 암호화 해서 user객체에 다시 저장하기.
		String securepw = encoder.encode(vo.getPassword());
		System.out.println("암호화 후 비번 : " + securepw);
		vo.setPassword(securepw);

		mapper.register(vo);
	}
이때 스프링의 메이븐 API인 회원 비밀번호를 암호화 하여 저장한다.
사용 Api 명은 Spring Security이다 사용방법은 나중에 포스팅 하도록 겠다.

다만 주의할 점은 암호화를 할 경우에 암호화 이전에 만들었던 아이디와 패스워드로는 로그인이 불가능하다.
이제 서비스에서 Mapper.register 쪽으로 User의 값을 전달한다.
void register(UserVO vo);이제 회원 가입을 할 xml을 만들자
8. Mapper.xml 작성
 <mapper namespace="com.spring.mvc.user.repository.IUserMapper">

    <resultMap type="com.spring.mvc.user.model.UserVO" id="UserMap">
    	<result property="regDate" column="reg_date"/>
    	<result property="sessionId" column="session_id"/>
    	<result property="limitTime" column="limit_time"/>
    </resultMap>

     	<insert id="register">
     	iNSERT INTO mvc_user
		(account,password,name)
		VALUES(#{account},#{password},#{name})
     	</insert>
코드블럭에는 xml이 없구낭...
mapper의 namespace에는 직전에 작성하였던 IuserMapper의 경로를 넣어준다.
이때 데이터베이스의 컬럼명과 VO객체의 변수명의 이름이 다를 때 ResultMap 이라는 태그를 작성해야한다.
property ="UserVO의 변수명" column ="DB의 컬럼명" 을 작성해 준다.
단 이것은 Select문에서 적용한다
Insert에서는 사용하지 않는다 하지만 미리 작성해서 나쁠건 없다.
8. 최종 동작 확인
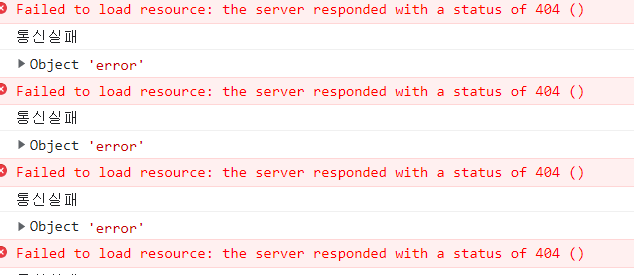
ㅇ ㅏ.. ajax에서 404에러다..
컨트롤러에서 리퀘스트바디나 url 문제같은데..
다했는데..
다음 포스팅은 아마도 오류 해결을 해야할거같다..
'Spring > 학원에서 배운거정리 끄적' 카테고리의 다른 글
| Spring 게시판(1) 🤪 (0) | 2022.02.15 |
|---|---|
| Spring스프링(Spring) 회원가입 진행(3-1) ajax 문제해결 404 error (0) | 2022.02.14 |
| Spring(4) 로그인 처리 및 로그인 검증 세션작업(1)😁 (0) | 2022.02.14 |
| 스프링(Spring) 회원가입 진행(2) 유효성 검사 ajax로 아이디 중복확인 (0) | 2022.02.09 |
| 스프링(Spring) 회원가입 진행1 테스트모듈 Junit4(1) (0) | 2022.02.08 |